Tests for mechanical and technological properties of tubes
Selection of tests shall be governed by relevant standards that apply to individual products and by customer requirements.
Unless otherwise specified, tests relate to samples taken longitudinally.
Tests for mechanical properties of tubes
Tensile test at ambient temperature according to EN ISO 6892-1, ASTM A370, ASTM E8, GOST 10006
Determined values (depending on the conditions set):
- The upper yield point ReH or agreed yield point (Rp0,2; Rt0,5….)
- Tensile strength Rm (MPa)
- Elongation at break (%)
- Contraction (%)
Tensile test at elevated temperature (optional)
Determined values:
- Agreed yield point Rp0,2 or Rt0,5 at a given temperature (MPa)
EN 10002-5, DIN 50 145, ČSN/STN 42 0312
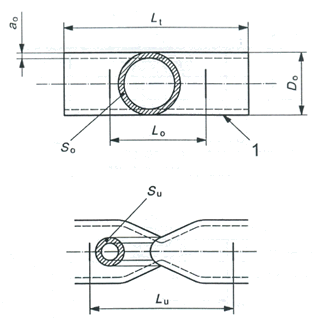
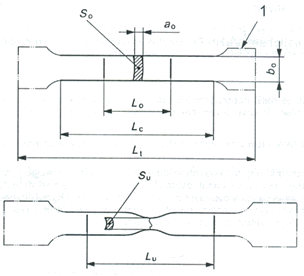
Tensile test at elevated temperature (optional) according to EN ISO 6892-2, ASTM E21, GOST 19040
Determined values (depending on the conditions set):
- Agreed yield point Rp0,2 or Rt0,5 at a given temperature (MPa)
- Tensile strength Rm (MPa)
- Elongation at break (%)
- Contraction (%)
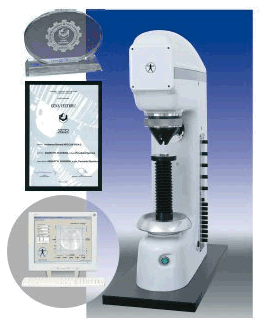
Hardness test according to standards EN ISO 6508-1, ASTM E 18, EN ISO 6506-1, ASTM E 10, GOST 9012, EN ISO 6507-1, ASTM E92, ASTM A370
Determined values:
- The hardness values depend on individually used (possible) methods: Rockwell, Brinell alebo Vickers.
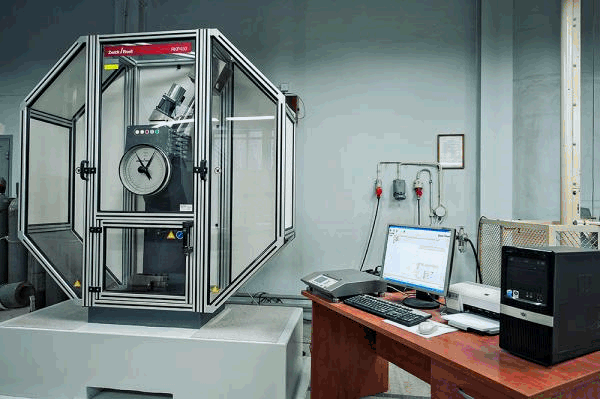
Bending impact test even at ambiet temperature and at low temperatures ISO 148-1, GOST 9454, ASTM E23 and ASTM A370
The possibility of making the examination depends on the dimension of tubes.
Determined values:
- The minimum average impact energy KV (J).
Creep tests (creep) according to standards EN ISO 204, ASTM E139
Creep tests are not subject of tube acceptance, steel is long-term tested during the verification of the production technology.
Determined values:
- Yield creep RT (t / A / T) is the strain that during the time t at temperature T causes A (%) mean of permanent elongation measured length of the trial bar. e.g. A = 1% for 10 000 hours at 500 ° C – RT 10 000/1/500 = 70 MPa.
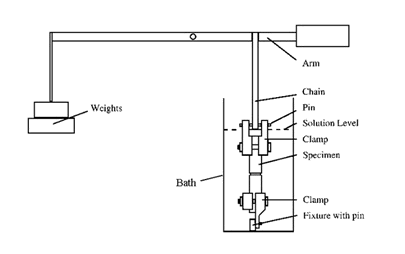
Stress-rupture RmT (t / T) is the strain at which permanent operation at temperature T is the mean time to fracture t. e.g. stress of 100 MPa causes at the temperature of 600 ° C for 10 000 hours fracture of part – RMT 10 000/600 = 100 MPa. Data are presented in the Annexes of standards and may be used for calculations. At present, in practice, the second value is used and for strength calculations it is compared with the below creep area of the yield strength at higher temperatures. The lower value is always used.
Tests of metal fatigue – are not included in the TDP for the tubes delivery.
Tests of the technological properties of tubes
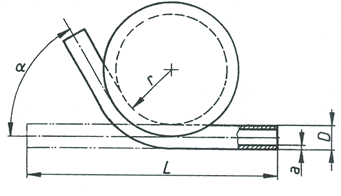
Bending test according to EN ISO 8491, ASTM A53, ASTM A106, GOST 3728
The test examines the ability of plastic deformation in metallic tubes of circular cross section. The tube bends around the pulleys with the specified radius, up to a prescribed angle. While this is being done, visible cracks are not allowed to form. Tubes tested are with a diameter of 60,3 mm.
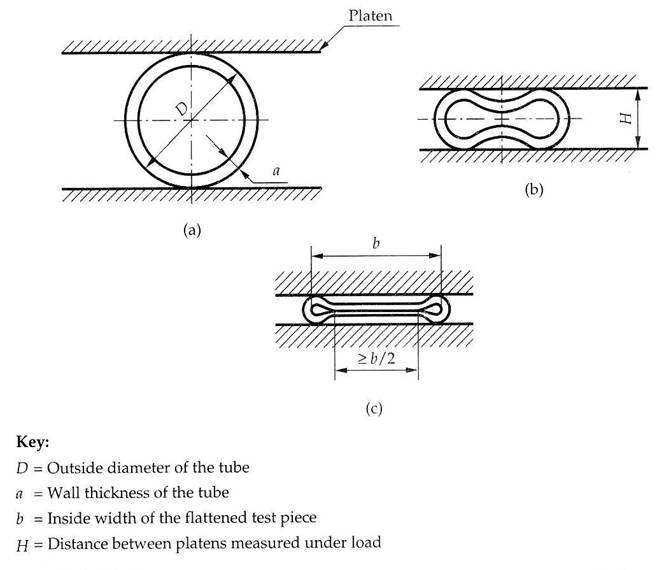
Test by flattening according to EN ISO 8492, ASTM A450, ASTM A530, ASTM A999, ASTM A1016, GOST 8695
The sample is flattened between the plates until the distance between them reaches a value H prescribed by standard. This depends on the steel, forming constant C and the tube dimensions.After the test, the samples must not have visible cracks and fissures.
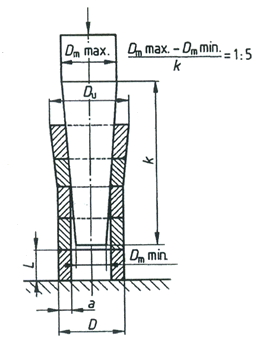
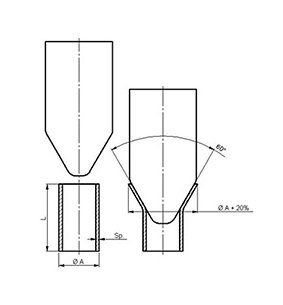
Flaring test according to EN ISO 8493, ASTM A 450, ASTM A1016, GOST 8694
The sample is expanded by a tapered mandrel until the percentage of flaring of the outside diameter obtains values stated in standard. After the test, the samples must not have visible cracks and fissures.
The test is performed to a diameter of 150 mm and wall thickness 10 mm.
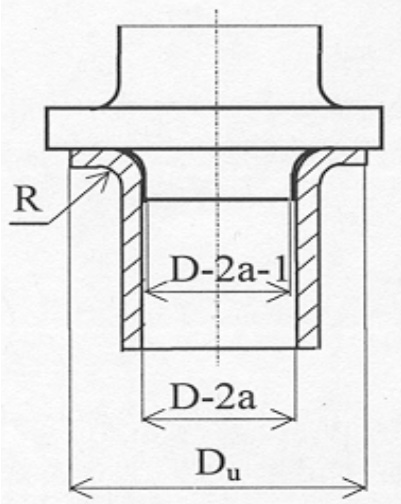
Flanging test according to EN ISO 8494, ASTM A 450, ASTM A1016
The samples end is formed into a flange, which lies in a plane perpendicular to the axis of the tube until value reaches the value of the outside diameter of flange, which is determined in the standard of the product.
Ring expanding test (ring test) according to EN ISO 8495
The test ring is expanded by a mandrel until it fractures. On the surface, in addition to the fracture may not be visible cracks and fissures.
